What better way to start the blog with information on Neverwinters latest update with Cradle of the Death God... basically an evil space baby that cry's are chilling enough to creep you out. That aside here is a basic run down on how to get threw cradle successfully and yes if it is your first time in there that push an pull mechanics will take a few rounds of practice to get the hang of it so don't freak if you cant do it first try! Its honestly the hardest part of Cradle and once you get it down, running it can be faster than running tong!!
When loading in you can skip cut scenes besides the last one right before you fight Atropal aka Evil space baby! Oh here is a picture of his backside and butt. Your welcome!

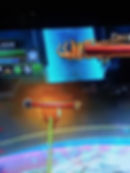
To start, after your team has loaded in you'll fight a few rounds of mobs. When you see the health bar of "Projection of Acererak" appear keep an eye out for these floating skulls to appear in the open section on the square platform, they are called "Exploding skulls" you can easily target them to get them to tether themselves onto you. Position yourself facing the large projection of Acererak on the opposite side the skull appeared, this will draw him to follow you. No team member should be attacking him (it's best to not attack anything while the skull is up) until he is across the middle of the platform, be sure to aim him when attacking. he explodes into the sky and hits the projection. Do this until the projections health bar is dead! Keep in mind it is possible to miss aim the skulls. Anyone remember aiming runes at the turtle boss in FBI? Its very much like that!!
After successfully completing this task you'll fight a few more mobs. The mobs are pretty easy. Keep in mind, currently their is no campfire within the entire place so changing loadouts is not possible. You can switch out moves in between mobs or sections of the trial when your character gets out of combat motion but you have to be quick, you can also re-summon your comp. It is possible to fall off the openings on the platform so running to many shepherds mount bonuses can hurt your team and so can fray from a gf! I'm not saying don't run these but keep in mind it can be the death of a member or two from uncontrollable movement speed lol! If you do die you can watch the rest of the fight via the scrying orb in the middle of the starting platform which is nice so you can cheer your team on and see whats happening. Lets get to the Jello cube phase shall we?!
Some people may do this section differently but my team/guild found it best to not attack mobs until after the cubes been taken care of. How do you take care of the cubes you ask? Well first this part of the trial is timed, while your in free fall on the platform you have three minutes to get the cubes close to the gears and use their slimy insides to stop the gears from turning. Don't do it in three minutes and your team dies. It may see like a short amount of time but it is actually very simple to do and their re-spawn time is fast so if you mess up chances are you can still make it. Ya go team! Working together here is a must, good communication is key to the entire trial succeeding. Be sure to keep that in mind and Join party chats!!!
My team went directly into the corners and pulled the Jello cubes here. Others may go to the opening where the squares are marked upon the floor but you risk being knocked off. If your team gathers in each corner (communicate what corner and direction your going as their are four corners and you risk messing up)
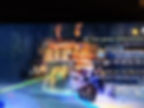
and wait until the cube is on top of you, kill it and its wonderful jelly insides spill out all over the gears shown in this picture. This stops these two gears. Do this for each of the four corners and you stop the free fall. DO NOT use the trex mount power during this phase! He will eat that jello cube for a snack and you'll have to wait for another to re-spawn! You'll get a skip-able cut scene which brings you to tentacle station! (That is not really what its called btw). Here you have a few seconds to change moves or re-summon your comp! At any time during this next phase you can go to an empty section along tentacle station and re-summon your comp. Be careful of fray, long striders and anything that gives access movement or you may sacrifice yourself or team mates to the death god... aka they die and have to wait at the starting platform. You can skip killing the mobs here and just kill the tentacles (Soulmonger Cord), once all 8 are killed (two in each section) you go into the unskip-able cut scene.
You have a few short seconds if no one attacks the giant space baby to also re-summon a comp or change a move if you hadn't already. Be mindful or dodge moves and your placement because you or your comp may fall easily off the circular platform. The evil baby boss does several attacks. One is a giant red circle around the inside or outside perimeter of the platform, its easy to move out of but also doesn't hurt a lot so if you get hit with it don't stress. It is a good idea to keep life scrolls on you and a lot at that! If you die right before the push/pull mechanic you can stay down until the pull is done if your timer allows it. Now these Push/Pull times are at every 25% health on his bar, so 4 times. and from what everyone says you cant burn past them, they happen no matter what so no one shots sadly.

After the third push/pull Atropal (giant space baby) will do a giant arm sweep and then you'll fight Acererak. He isn't difficult to beat up and when he dies stand inside the red circle aoe. then fight space baby until the final push/pull and you can then kill him. Now the hardest part of the entire trial is getting yourself used to the push and pull. Your space to fight Atropal is a circle all around him. Keeping your team together helps but watch out for aoes. He can besides his circular red attack that's along the perimeter of the platform you fighting on, also drops small red circles or bomb type hits, you can again move out of the way as you'll clearly see them on the floor. He also does two other attacks, much like in msva. One with orange red arrows flashing towards you, stand near team mates to help absorb this damage. Image below for reference!

You wont see any red on the floor with this so you should stand near your team mates to help absorb damage!
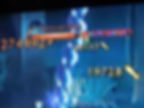
Now the next attach can be an issue, if you see a red circle under you feet, and bright red arrows above your toons head move out of the way asap of your group/team mates.
This attack places a blue circle on the ground that debuffs your team mates and makes them take more damage. this is where so many people are dying or getting one shots from, to many stacks and a little hit can kill you! the stacks on your toon last a few seconds each. You can sort of see the blue spiral circle in the above image. Do not stand in that circle unless you want to die fast lol!

Here you can see what the bright red circle looks like, there are always two up at once and can trigger on anyone from dps, tank or dc! The same goes for all attacks. Communication on where your moving or if you see someone with this above their head can help your team a lot!
Now for the hard part, The space baby does a tell when he is about to start the push/pull. First he takes no damage, then he drops down into his hole. You'll need to act fast and again communicate with your team. First i should explain, when i say push and pull what i mean. The boss is in the middle, you go to the outside of the circle platform first when this is happening, these faces on the fall behind you create a wind that pushes you towards the boss, you can fight it a few ways, run around the circle (we did this at a clockwise motion together because if you all run in different directions you can knock someone off easily as we found out the hard way) or standing still and using your stick to fight it, use your doges if your lucky enough to have them to also fight it works for some classes. Tanks you can raise a shield up to slow your movement and make it harder to be pulled but on the push you need to drop your shield so if your not fast enough during a reposition then you can get pushed off. Now i say pushed off because the first part (that lasts 4 seconds and counting it out for the team really helps) pulls you towards the space baby but the one second push, literally pushes you away from him. You can feel both the push and pull physically on your toon and after the four seconds you have a very tiny amount of time to get ready for the push that lasts one second. I found it easiest to stand as still as possible on the outer edge of the platform when the push happens, fighting it slowly and counting, then placing myself on the inner part asap when the push is done to get ready for the pull. to fight the pull towards the edge of the platform i sometimes had to use my wizards dodge/teleport. This saved me a lot! Now some classes like gwf or SW cant use theirs as its to large of movement burst. The easiest way to avoid being knocked off the platform is to run in the circle around the boss, starting on the outer edge and working outwards the inner when the pull is about to happen. It will take a few tries to really see what woks best for you. After out second and third try i was able to stay on with my cw so its easy to learn, just figure out what works best for you and don't get frustrated if it takes a few times. I recommend practicing first, get a team together and make sure everyone is able to run for an hour or so to really let you get the hang of it. Oh yeah, if you fail at the last boss you have to start allllllll over. Their have been rumors and talk that they are going to add a camp fire at the baby boss but who knows when that will happen. Fingers crossed soon! That really is where your time gets eaten up in this. The push pull is actually harder then fighting the space baby ironically.
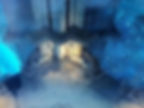
This picture shows the mouths where the wind comes from. I have heard standing close to them will almost always get you knocked off but this hasn't been prove yet from what I've seen/heard. You can also see the outer edge of the platform you'll fight on. Its small and circular (that's what she said) so its easy to fall off.
Communicate and talking can really help make this go easy for you! Some teams are already doing 10min runs so it just takes practice! And may end up being more profitable than tong in the long run.
Also if you run a lightning, try to not attack during the skulls and jello cube part as you may kill or stun them. I'm not saying don't run it but you may want to look into another enchantment for this trial specifically. I keep calling it a trial as I am not sure if it classifies as a raid with it being a 10man?
Below are some random pics from the fight that i didn't include above. I hope this helps and if you have any questions please ask or any other tips i can add or info to fix let me know! Id love to hear from you with feedback as this is our first post. Expect more Neverwinter related posts soon! and thanks for reading! - Controller (get it I main a control wizard lol!!) #neverwinter #Cradleofthedeathgod #mmorpg #contoller #neverwinterblog #lostcityofomu #dungeonsanddragons #Girlgamer #Gamer #Gamerblog #Videogames #Videogameblog #blog